In this tutorial, you will learn how to download and install Teradata SQL Assistant. You will also learn to connect Teradata RDBMS using Teradata SQL Assistant.
Teradata SQL Assistant is a query tool by which you can perform various tasks like querying data from the Teradata database, inserting data into Teradata, Administrative works like creating objects, User management, roles, and profile management, and extracting reports in a formatted manner. Teradata SQL Assistant is referred to as Teradata Tools and Utility product.
Downloading and Installing Teradata SQL Assistant
Teradata SQL Assistant comes as a Teradata Tools and Utility (TTU) product. In order to download it, you need to download TTU package from the below link.
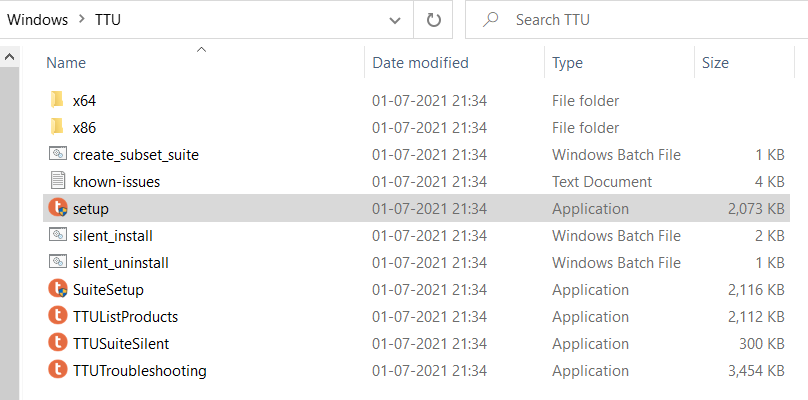
Once downloaded, navigate to the downloaded folder and double click on the setup file.
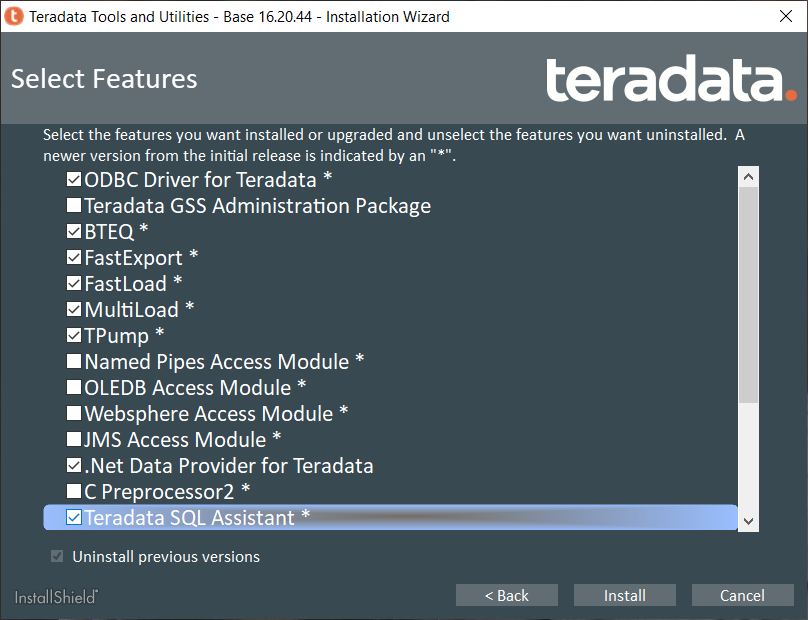
The below window will appear. Select Teradata SQL Assistant and proceed further.
Or, you may directly navigate to the folder of Teradata SQL Assistant and run the setup file.
Navigation Path:
TeradataToolsAndUtilitiesBase__windows_indep.xx\TeradataToolsAndUtilitiesBase\
Windows\TTU\x86\SQLAssistant
Defining Data Source and Connecting Teradata
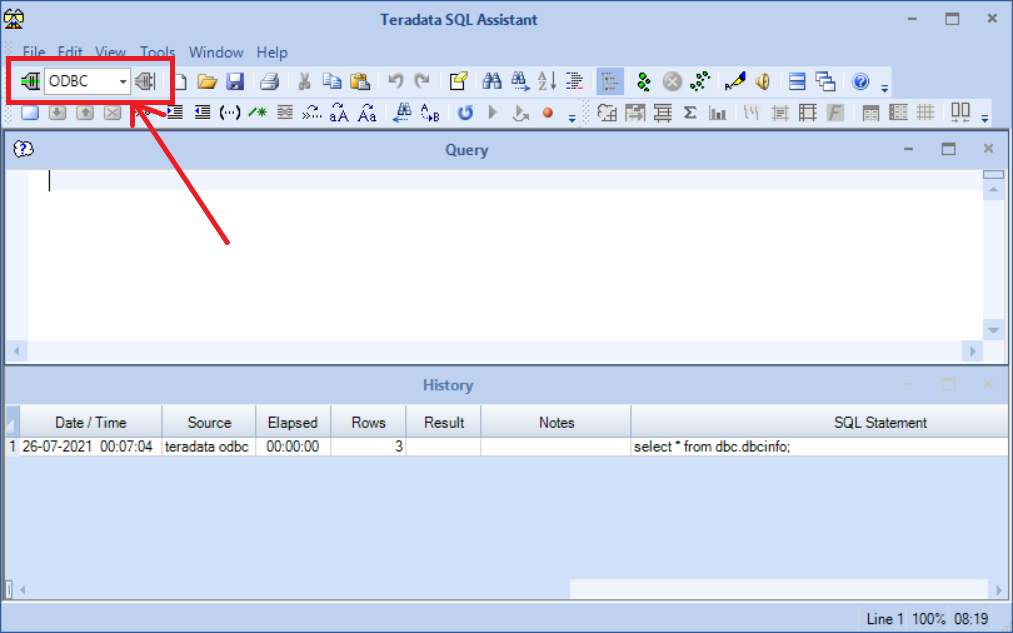
Step 1: Once the installation is complete, open the Teradata SQL Assistant. You will find connect option in the extreme left corner just below the file option. Select the ODBC option and click on connect.
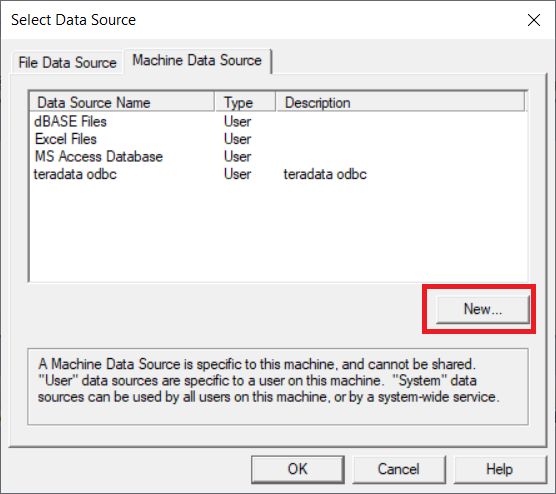
Step 2: In the next screen of Select Data Source, select Machine Data Source and click on New.
Step 3: Click on Next and Select Teradata database ODBC driver from the Extreme last. Then Click and Finish.

Step 4: On the next window provide the below information and click Ok.
Name – Teradata ODBC or any name you want.
Description – Teradata ODBC or any description you want.
Name or IP address – Teradata server IP address or Name. In this case, I am using my local installed Teradata.
Mechanism – TD2
Username – dbc (default user came with after new Teradata Installation. We can create other users later.)
Password – dbc (default password)

Step 5: On the next step once you click ok twice the ODBC driver will connect Teradata SQL Assistant to the Teradata System.
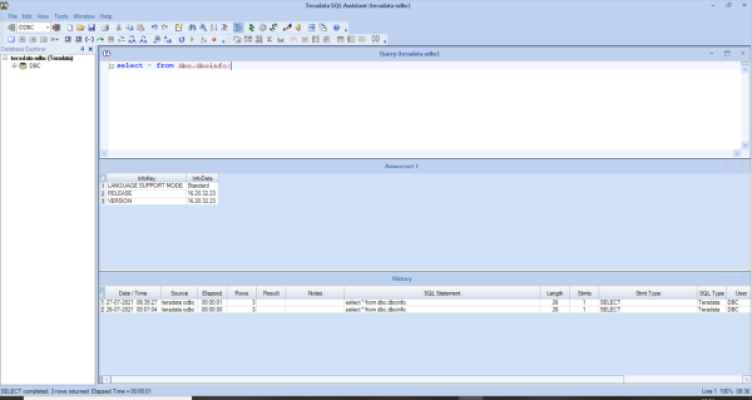
Step 6: Once you are connected to the Teradata System, you can check the version of the Teradata database using the following Query.
select * from dbc.dbcinfo;
Teradata SQL Assistant Additional Setup
Below are some of the additional setup you may want to do with Teradata SQL Assistant,
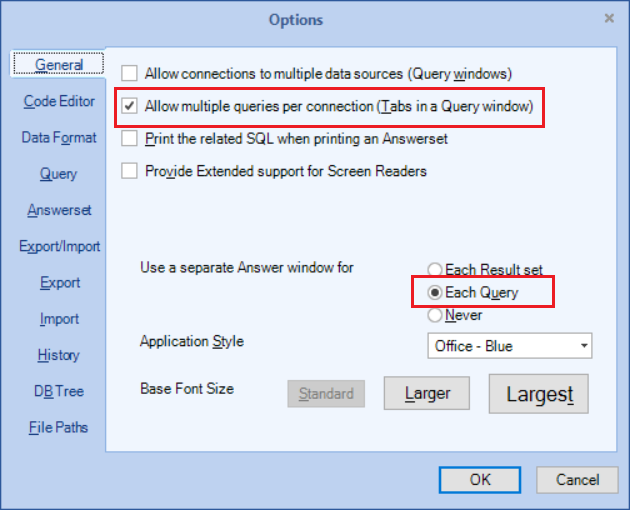
1) Separate Answers window for the query
To set up a separate answer sheet window for each query, you can follow the below steps.
a) From the menu bar, click on Tools.
b) Next click on options. The options window will open.
c) Now click on the “General” tab.
d) Select Allow multiple queries per connection.
e) And for “Use a separate Window for” select “Each Query”.
f) Now click on the Query tab and uncheck the option “Close Answers windows before submitting a new query”.
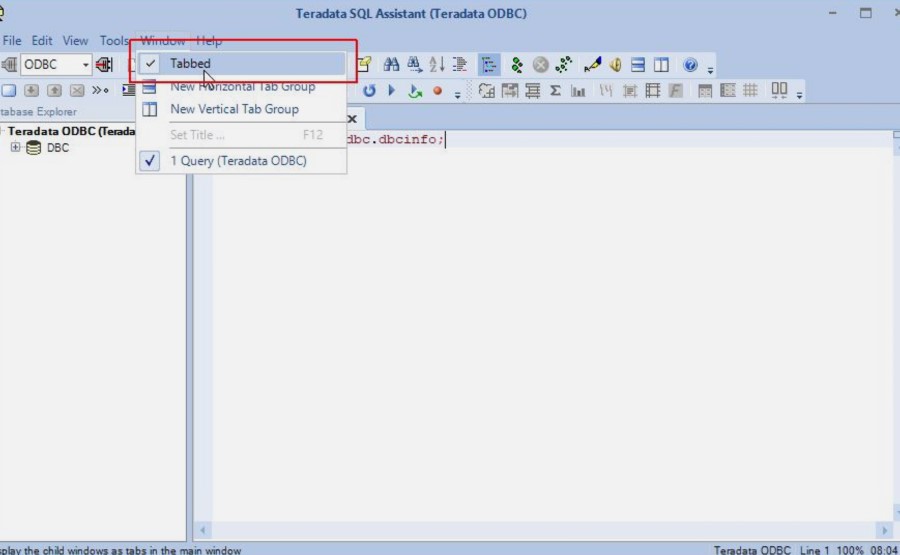
2) Teradata SQL Assistant tabbed answer sheet
a) Go to Window.
b) Now select Tabbed.